Introduction
Azure Kubernetes Service (AKS) manages your hosted Kubernetes environment, making it quick and easy to deploy and manage containerized applications.As a fully managed service, AKS automates critical tasks like scaling, security patching, and workload deployment—freeing teams to focus on building applications rather than infrastructure.
This guide covers step by step implementation for Azure Kubernetes Service(AKS).
Prerequisites
- Azure Account: Active subscription with sufficient permissions
- Azure CLI: Latest version installed (download here)
- If not installed use command :
curl -sL https://aka.ms/InstallAzureCLIDeb | sudo bash
- kubectl: Kubernetes command-line tool
Step 1: Sign in to Azure Portal
- Go to https://portal.azure.com
- Sign in with your Azure account credentials
Step 2: Create an AKS Cluster
- In the Azure portal, click Create a resource (+) in the upper left corner.
- In the search box, type “Kubernetes Service” and select it from the results.
- Click the Create button.

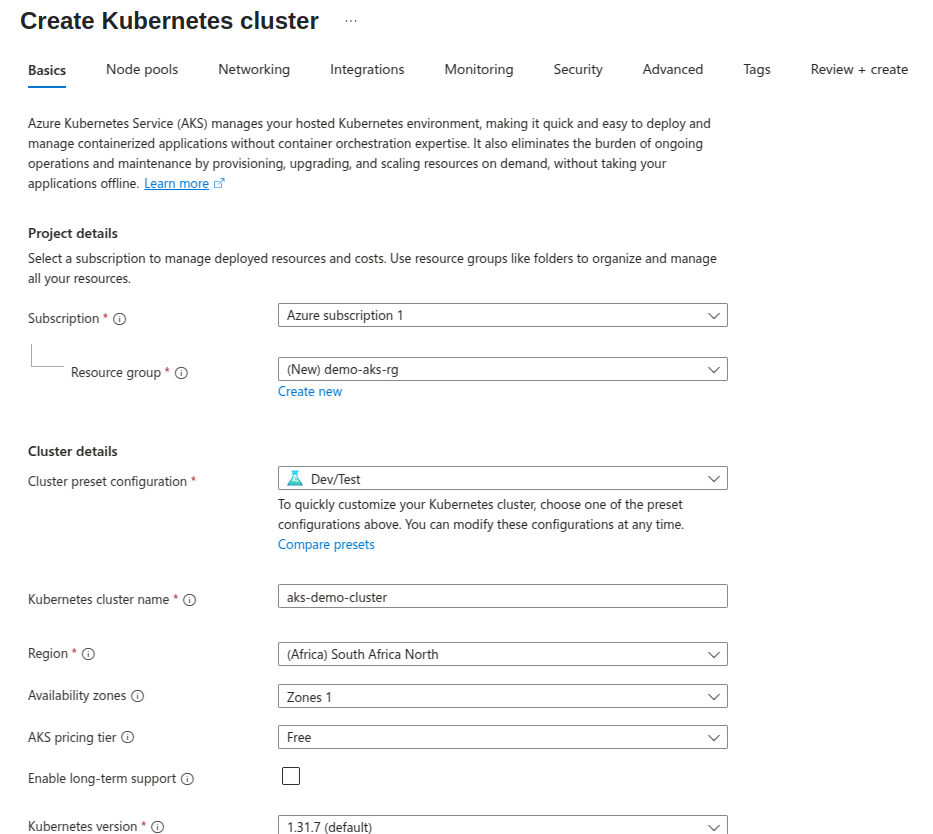
Step 3: Configure Basic Settings
1. Project Details:
- Select your Azure Subscription
- Choose an existing Resource group or create a new one, new resource group name must be unique
2. Cluster Details:
- Cluster preset configuration
- For practice purposes and development/testing tasks, select a cluster preset configuration that suits your needs, such as “Dev/Test.”
- Enter a Kubernetes cluster name (e.g., “myAKSCluster”)
- Select the Region (consider proximity and compliance requirements)
- Choose the Kubernetes version (AKS will default to the latest stable version)
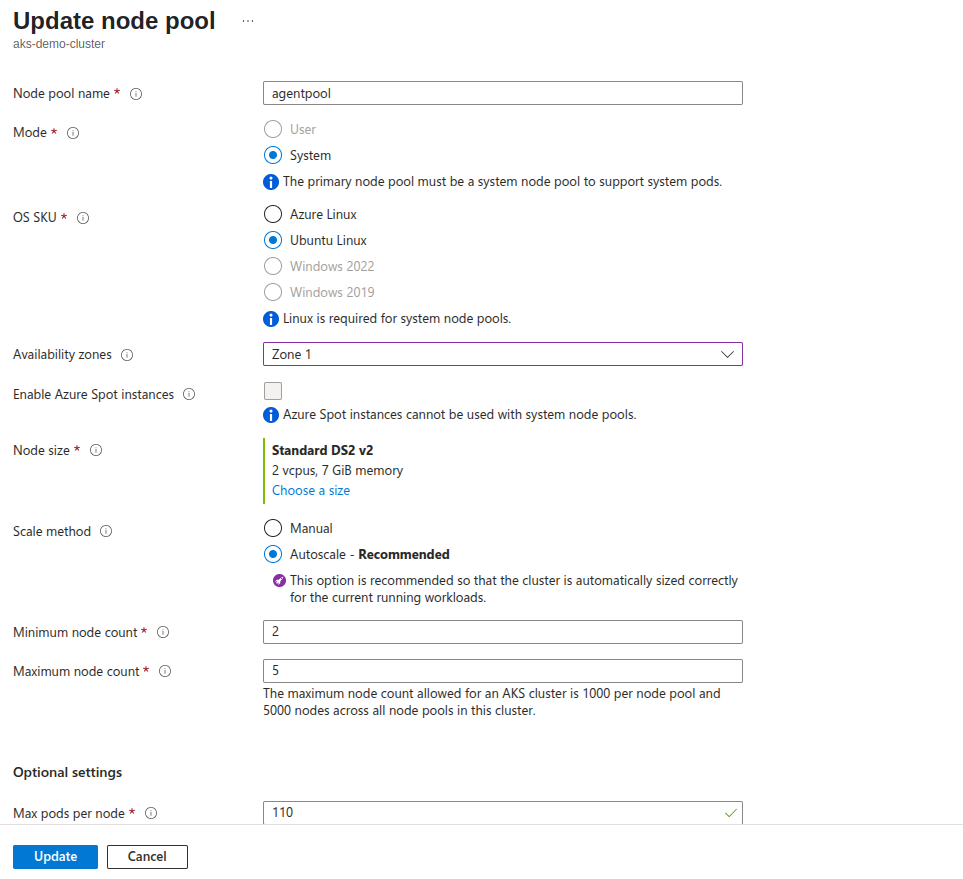
- Select the Node size (Standard_DS2_v2 is good for testing, production needs may vary)
- Set the Node count (start with 1-3 nodes for testing)
- Availability Zones (recommended for production)
- Enable if your region supports it (select specific zones if needed)
- AKS pricing tier:
- Choose between Free (with limited support) or Standard (recommended for production).
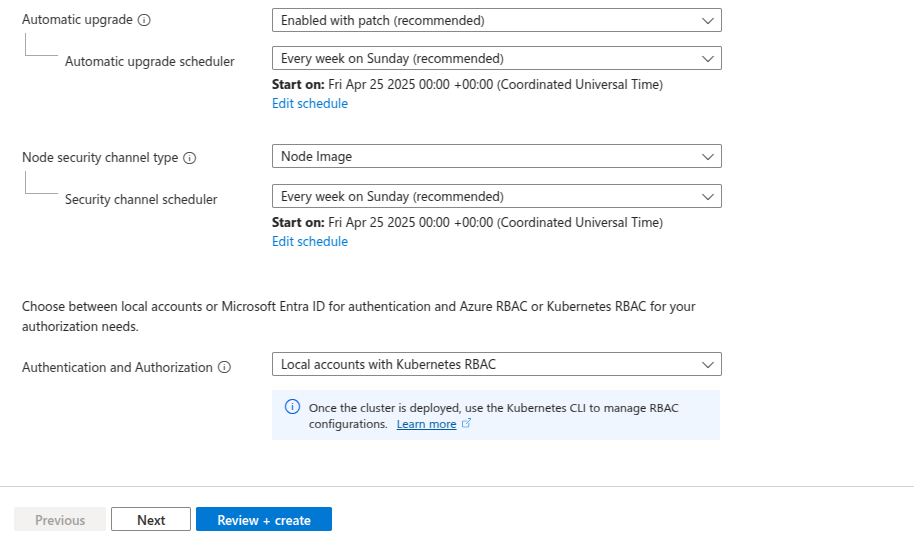

Step 4: Configure Node Pool
- You can add or customize node pools based on your application requirements.
- Define the number of nodes, VM size, and other settings for your node pool.
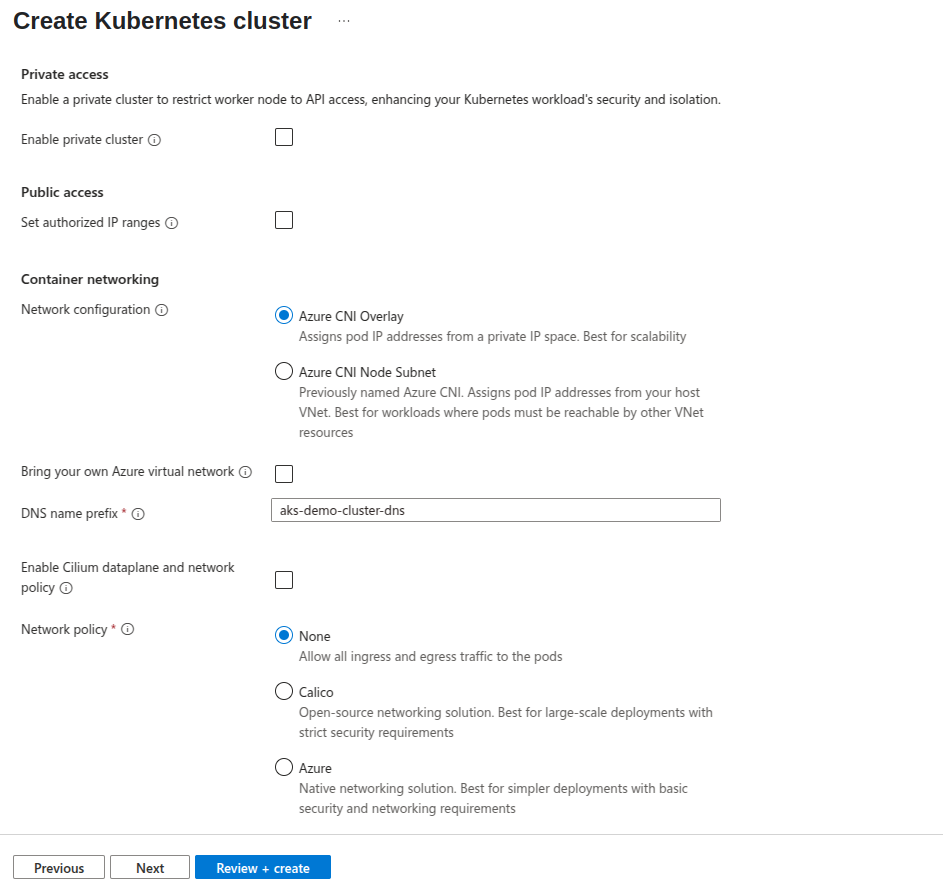
Step 5: Configure Networking
- Configure the networking settings for your AKS cluster. In most cases default settings are fine.
Step 6: Configure Integrations
- Configure integrations with Azure services and features.
- You can enable Azure Container Registry integration, Azure Policy, and more.
Step 7: Configure Monitoring
- Enable monitoring if you want to use Azure Monitor and Azure Log Analytics for cluster monitoring and diagnostics.
Step 8: Review + create
- Review all the configuration settings to ensure they are correct.
- Click the “Create” button to start the provisioning of the AKS cluster.
Wait till your deployment proceeds.The deployment might take 10-15 minutes.Once completed goto resource
Step 9 : Connect with Cluster
- You can use the CLI terminal of your choice or you can use the cloushell terminal provided in Azure.
-
If you choose to use CLI other then cloudshell then:
- Login to Azure
az login
- Get AKS Credentials
az aks get-credentials \
–resource-group yourResourceGroupName \
–name yourClusterName
-
To verify the association to your cluster, use the kubectl get command to explore the cluster.
You can use few commands like :
- List all nodes within cluster
kubectl get nodes
-
List all namespace
kubectl get namespaces
- List Pods from all namespaces
kubectl get pods –all-namespaces
Congratulations! 🎉🎉 You’ve successfully created an Azure Kubernetes Service (AKS) cluster which is ready for you to deploy and manage containerized applications.

